Listen to this article
Table of Contents
To install LAPG Neoprene Tactical Knee Pad Inserts, turn the pant leg inside out, find the opening at the top of the white internal knee pocket, fold the flexible insert lengthwise, feed it through the opening, and flatten it inside the compartment. Put the pants on afterward and kneel on a safe surface to confirm that each pad is centered over the knee.
These instructions apply only to the LA Police Gear Atlas Men’s STS Stretch 10 Pocket Tactical Cargo Pant and the LA Police Gear Atlas Men’s BDU STS Stretch 6 Pocket Tactical Cargo Pant.
Watch the installation video: How to Insert Knee Pads Into LAPG Tactical Pants
Compatible LAPG Pants
This installation method is confirmed for these two styles:
- LA Police Gear Atlas Men’s STS Stretch 10 Pocket Tactical Cargo Pant
- LA Police Gear Atlas Men’s BDU STS Stretch 6 Pocket Tactical Cargo Pant
The standard Atlas Pant includes two internal knee-pad pockets sized for traditional neoprene inserts. The LAPG Neoprene Tactical Knee Pad Inserts are sold as a pair and use 3/8-inch cushioned neoprene in a 9-by-7-inch shape.
These instructions do not apply to the LAPG Atlas Combat Pant, which uses a different integrated knee-pad system.
What You Need
- One pair of compatible Atlas or Atlas BDU pants
- One pair of LAPG Neoprene Tactical Knee Pad Inserts
- A clean, flat work surface
No tools are required. The neoprene inserts are flexible enough to fold temporarily during installation.
How to Insert the Knee Pads
Step 1: Turn the Pants Inside Out
Turn the pants inside out so the internal knee-pocket lining is fully exposed. Lay one pant leg flat with the inside of the knee area facing upward.
Working from the inside makes the opening easier to find and gives you better control while feeding and positioning the insert.
Step 2: Find the Opening in the White Knee Pocket
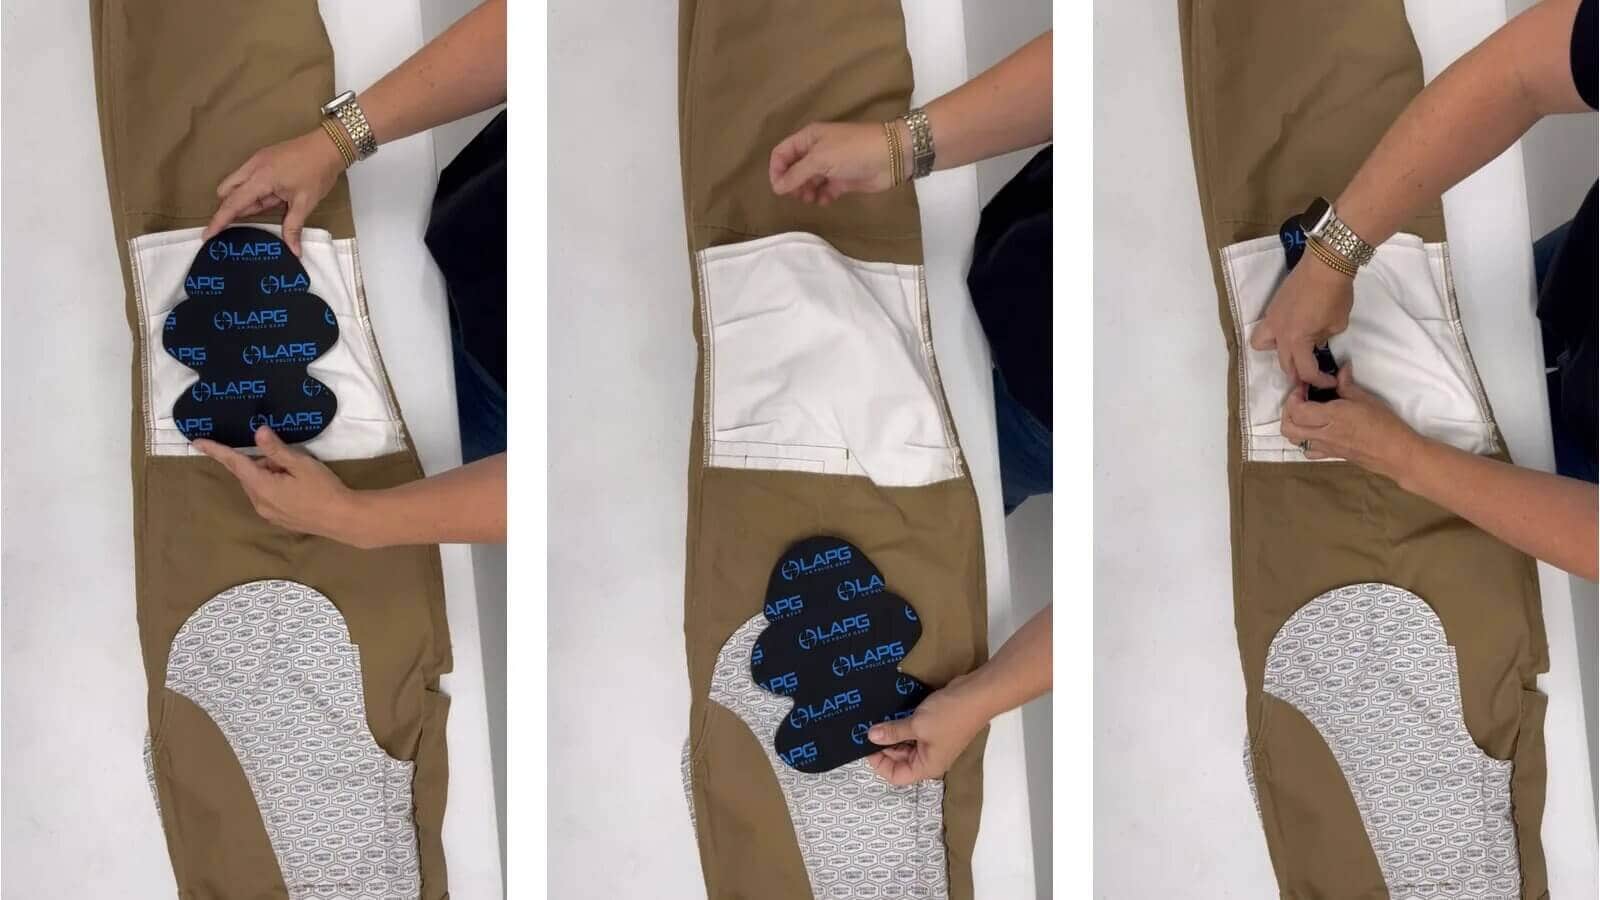
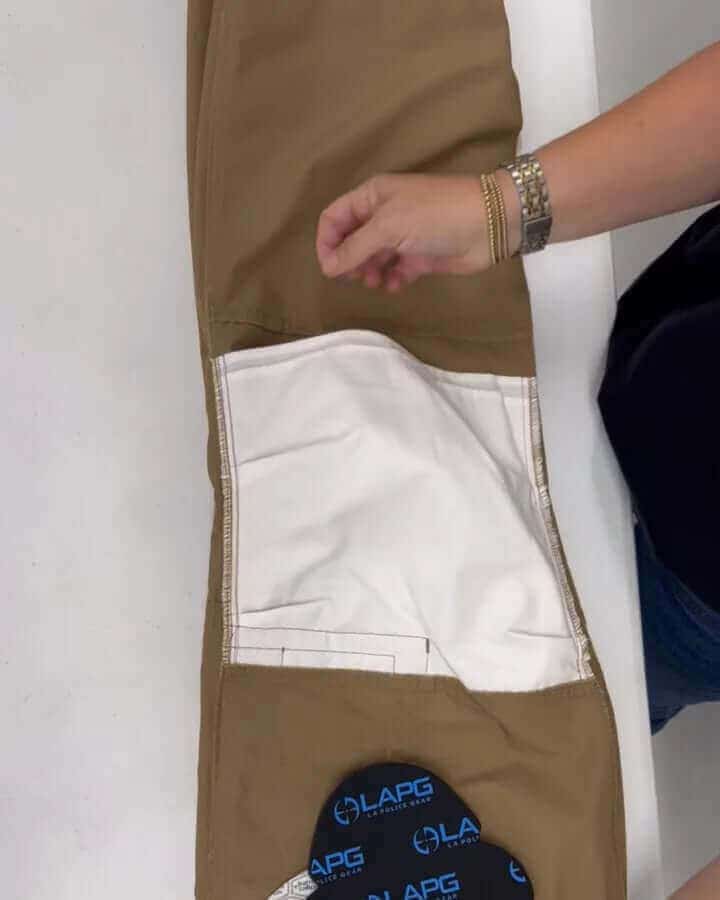
Locate the white liner behind the articulated knee area. The pad goes through the small opening along the top edge of this liner.
Gently separate the layers with your fingers. Do not place the insert between the white liner and the outer pant fabric.
Step 3: Align the Insert With the Pocket
Hold the insert vertically over the pocket so its long direction follows the pant leg. Matching the pad to the compartment before folding it makes the final positioning easier.
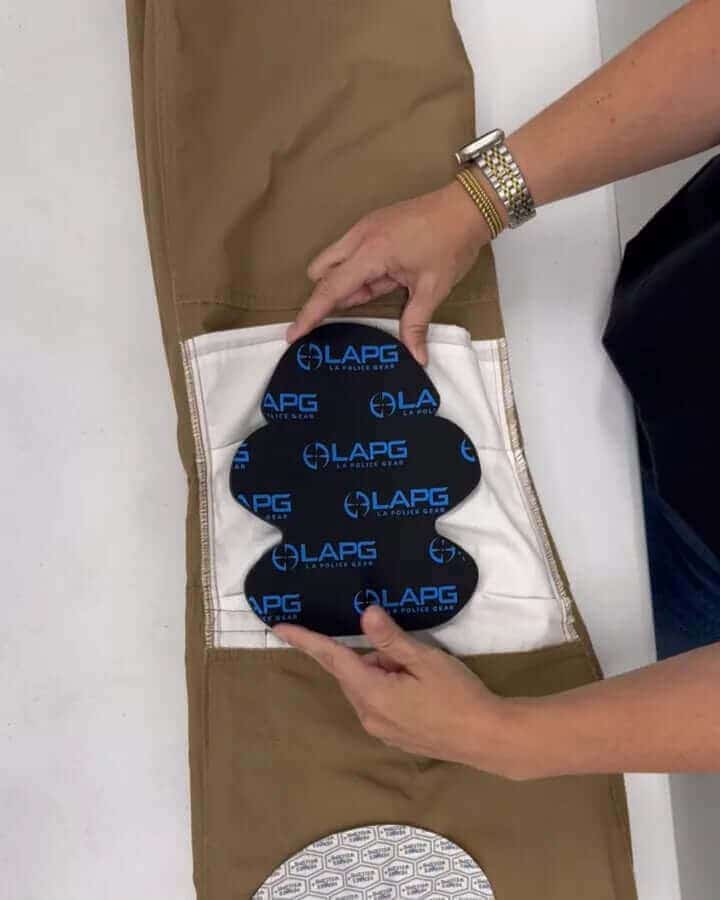
Step 4: Fold the Insert Lengthwise
Bring the sides of the flexible pad toward one another to make it narrow enough to pass through the opening.
Use a gentle fold rather than a sharp crease. The insert only needs to stay compressed long enough to move through the pocket opening.
Step 5: Feed the Pad Into the Pocket
Insert one end first, then work the rest of the pad through a little at a time. Alternating between pushing the insert and guiding the pocket liner around it is easier than forcing the full pad through at once.
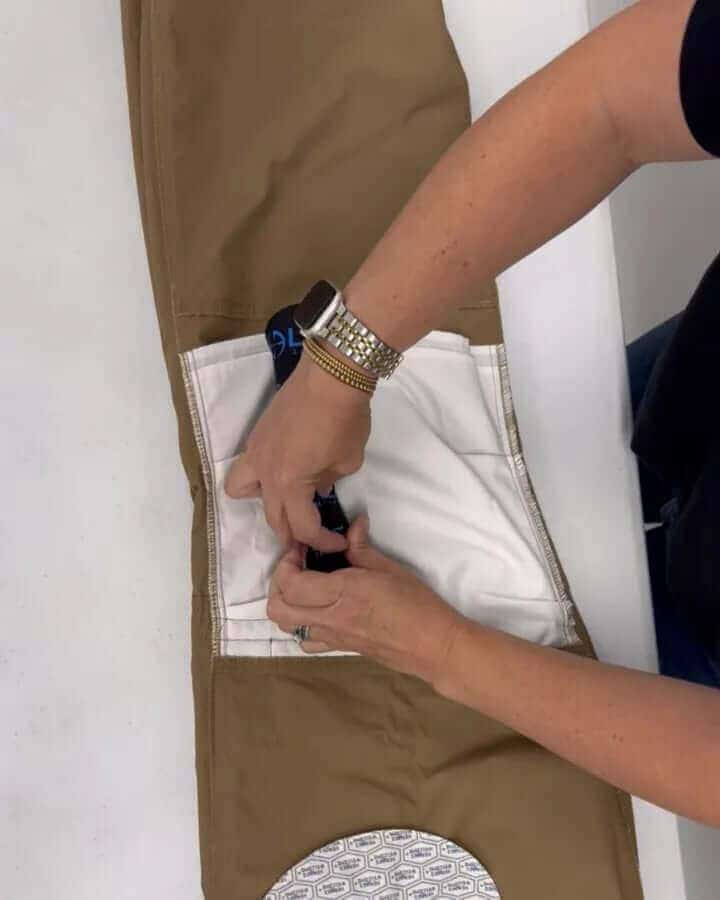
Step 6: Unfold and Flatten the Insert
Once the entire pad is inside, let the neoprene expand. Smooth it from top to bottom until the pad and pocket liner lie flat.
Check that no edge is folded underneath and that the insert is centered inside the compartment. Repeat the process on the second pant leg.
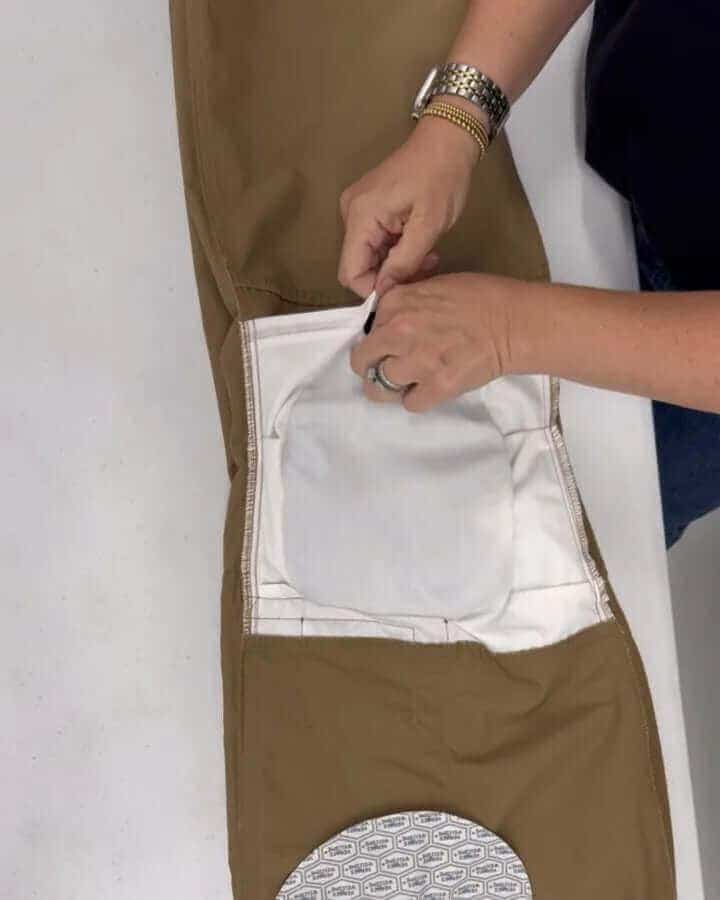
Step 7: Check the Position While Wearing the Pants
Turn the pants right side out and put them on. Walk, squat, and kneel on a safe, clear surface.
The main padded area should sit between your knee and the ground when you kneel. If it feels too high, too low, or off to one side, remove the pants and reposition the insert before use.
Benefits of Internal Knee-Pad Inserts
Added Cushioning While Kneeling
The 3/8-inch neoprene adds a cushioned layer between the knee and surfaces such as pavement, concrete, gravel, packed dirt, or a vehicle floor. This can improve comfort during tasks that involve repeated or extended kneeling.
OSHA notes that prolonged or repeated kneeling on hard surfaces can create contact pressure at the knee and recommends knee pads or foam padding for prolonged kneeling activities. Review OSHA’s lower-extremity ergonomic guidance.
Low-Profile Placement
Because the inserts sit inside the pants, there are no external straps to tighten or reposition. The internal setup also keeps the outside of the pant cleaner and less bulky than a conventional strapped knee pad.
Flexible and Removable
The neoprene flexes with the pant rather than creating a rigid knee assembly. The inserts can be installed when cushioning is useful and removed when a lighter setup is preferred.
Useful for Several Types of Work and Training
Internal cushioning may be helpful during range drills, equipment setup, vehicle maintenance, outdoor field work, training exercises, yard work, and other tasks performed close to the ground.
What These Inserts Are—and Are Not
The LAPG inserts are flexible neoprene cushioning. LAPG does not publish a puncture-resistance rating, impact-protection certification, or hard-shell protection standard for this product.
They should not replace task-specific protective equipment when work involves sharp debris, broken glass, exposed fasteners, high-energy impacts, or another identified workplace hazard.
Troubleshooting Common Installation Problems
I Cannot Find the Opening
Make sure the pant leg is fully inside out. Look at the top edge of the white liner behind the knee and gently separate the opening with your fingers.
The Pad Will Not Fit Through the Opening
Remove it and make a narrower lengthwise fold. Feed one end in first and work gradually instead of trying to push the entire insert through at once.
The Pad Feels Lumpy
An edge is probably folded underneath. Reach into the pocket and smooth it flat, or remove the pad and reinstall it.
The Pad Does Not Cover My Knee When I Kneel
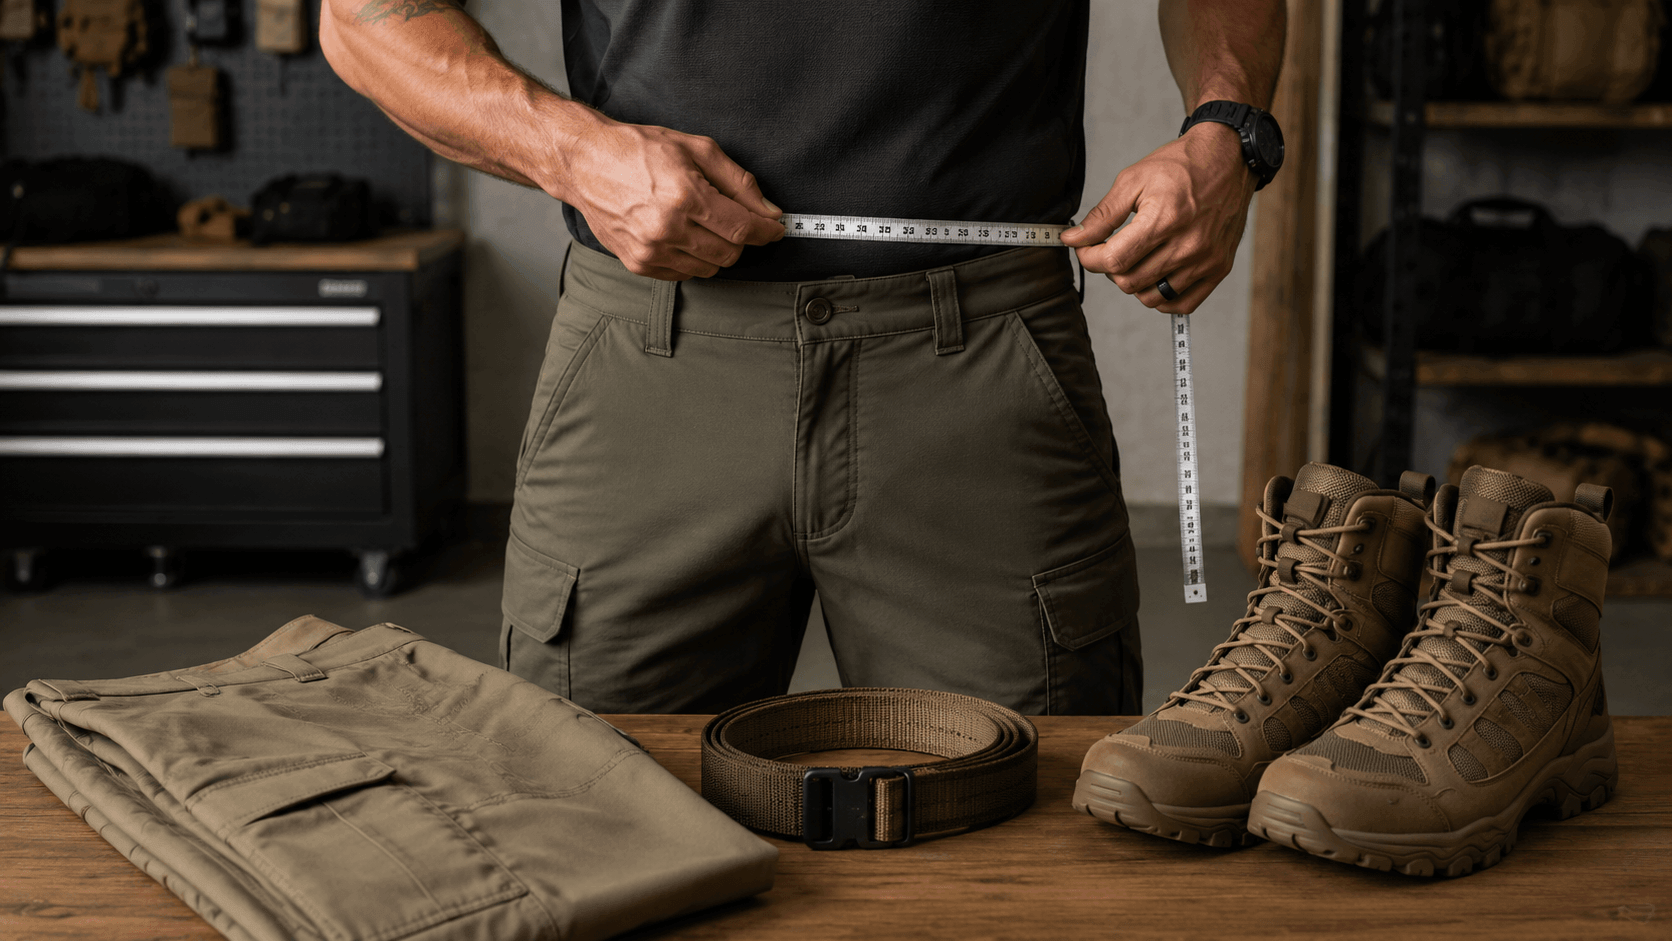
Confirm that the insert is vertical, completely unfolded, and centered. If the entire knee panel sits above or below your knee, the pant’s inseam or overall fit may be the issue. See our guide on how to measure yourself for tactical pants.
The Pad Shifts to One Side
Flatten the insert and pocket lining again. If the knee panel consistently rotates while kneeling, check the fit through the thigh, knee, and inseam rather than continuing to reposition only the insert.